



Weatherproofing a wooden shed is mostly about water management, not coatings. Keep the roof sound, keep the gutter clear, keep the timber off wet ground and let moist air move. Naturally durable cladding such as larch and cedar needs no treatment at all to stay weatherproof. Pressure-treated pine needs a clear preserver every 2 to 3 years.
This guide covers where water actually enters a wooden shed, which cladding needs treating and which does not, how to keep a felt or living roof watertight, and the mistakes that make a shed wetter rather than drier.
What Does Weatherproofing a Wooden Shed Mean?
Weatherproofing a wooden shed means doing four jobs well: shedding water off the roof, keeping standing water off the timber, holding the floor clear of the ground, and allowing moist air to escape. A shed that does all four stays dry inside. A shed that fails any one of them rots at that point first.
The word waterproof is misleading when applied to timber. A wooden shed is not meant to be sealed. Timber absorbs and releases moisture with the surrounding air, and that exchange stops damp accumulating from inside. Wrapping timber in an impermeable layer traps moisture against it and accelerates decay. The objective is a structure that stays dry, not a structure that is airtight.
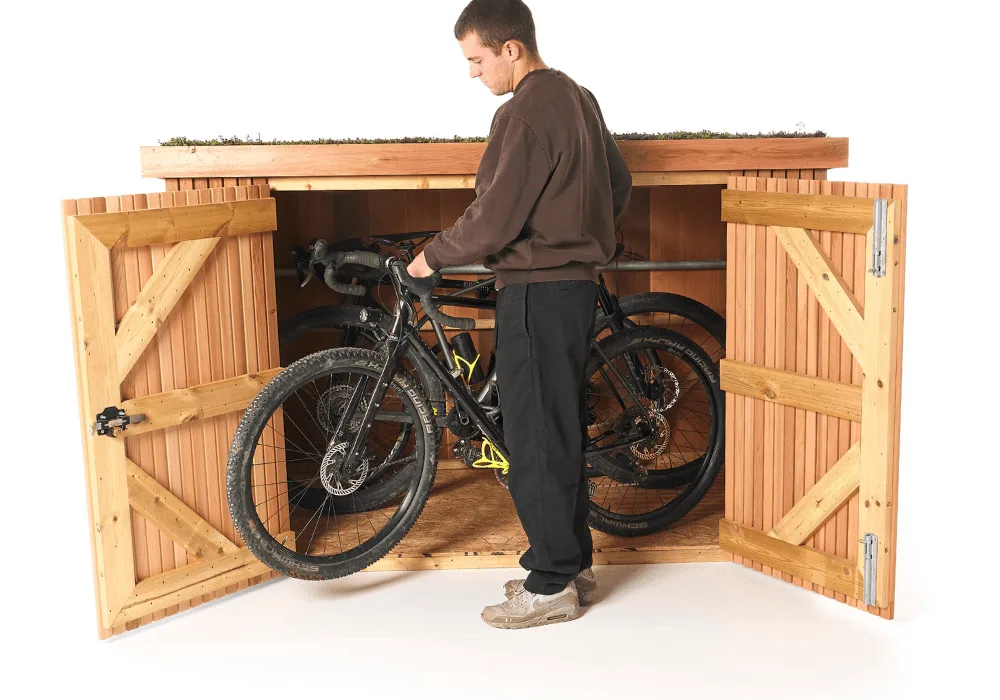
Our sheds are built around that principle. Slatted cladding is fixed with 6mm gaps. All nails, hinges and ironmongery are stainless steel or galvanised, and external screws are stainless steel or coated to resist water. The roof overhangs the walls to throw rain clear of the cladding. The floor sits on adjustable rubber feet that hold it away from surface water. Details of that construction sit on our guide to bike sheds built for the British weather.
Where Water Actually Gets Into a Wooden Shed
Six failure points account for almost every wet shed. In our experience, the order below reflects how often each one is the actual cause, rather than how dramatic it looks:
- Blocked or overflowing guttering. Water that should leave through the downpipe instead sheets down the cladding and pools at the base. This is the most common cause and the easiest to fix.
- Ground-level standing water and splashback. A shed sitting in a puddle wicks water up through the floor and the bottom of the cladding. Debris banked against the walls holds that moisture in place.
- Roof covering failure at the edges and laps. Wind lifts felt at the perimeter and at overlapping joints before it damages the middle of a roof. Water enters at the lift and travels along the deck.
- Downpipe discharge in the wrong place. A downpipe that empties straight onto the base concentrates every litre off the roof into the one spot where it does the most harm.
- Overhanging branches and constant shade. Timber that never dries stays biologically active. Leaf litter on a roof holds water against the covering and blocks the outlet.
- Condensation on the underside of the roof. Warm moist air meets a cold roof deck overnight and drips. This behaves like a leak but has nothing to do with rain.
None of the top five are solved by treating the timber. That is why treatment is the last thing on this page rather than the first.
Does a Wooden Shed Need Treating to Stay Weatherproof?
It depends entirely on the cladding. Larch and cedar need no protective treatment to remain weatherproof, and they resist decay by different means. Scottish larch contains a high level of natural oils that rise to the surface over time and form a patina, a natural protective skin. Western red cedar contains high natural levels of oil and tannins, which remain present in the wood even after UV weathering. Pressure-treated pine is already protected at the point of manufacture and needs a clear preserver reapplied every 2 to 3 years. Corten weathering steel forms its own protective surface and needs nothing.
Cladding | Treatment needed for weatherproofing | Optional for appearance |
|---|---|---|
Scottish larch | None. Natural oils rise to the surface and form a protective patina. | None required. Weathers to silver-grey. |
Cedar tongue and groove, cedar slats | None. High natural levels of oil and tannins, retained after UV weathering. | Products from the Osmo or Owatrol ranges hold the original colour. |
Pine tongue and groove, pine slats | Already pressure-treated. Apply Cuprinol Wood Preserver Clear every 2 to 3 years if left unpainted. | A flexible exterior paint such as Sadolin Superdec. Leave new cladding to settle for 3 to 6 weeks after installation before painting. |
Corten weathering steel | None. Develops a stable protective patina between 5 and 12 months of exposure. | None. The patina is the finish. |
Why Some Timbers Need No Treatment
Timber species are graded for natural durability under BS EN 350, which classifies heartwood resistance to fungal decay across five classes, from Class 1 very durable to Class 5 not durable. North American western red cedar is one of the few softwoods to reach Class 2, durable. Classes 2 and 3 are the classes specified for untreated external cladding as standard practice, which is why our larch and cedar sheds leave the workshop with no coating.
One condition attaches to that. The standard rates heartwood only. Sapwood, the outer living layer of the tree, is not considered durable and must be excluded from untreated cladding, as set out in GreenSpec’s guidance on timber cladding durability. Untreated cladding is a specification decision made at the sawmill, not a shortcut taken at the workshop. Cheap untreated larch containing sapwood will fail where correctly selected untreated larch will not. Architects specify Scottish larch in its untreated state for this reason.
For a fuller comparison of how these two timbers perform across durability, dimensional stability and weathering, read our Scottish larch and red cedar comparison. If you are still choosing a material, our guide to the best material for a bike shed sets timber against metal and plastic. The full range of finishes sits on our cladding options page.
Why Our Cladding Is Fixed Vertically
All of our cladding is fixed vertically, and that is a weatherproofing decision rather than an aesthetic one. Vertical boards and battens direct driven rain down and off the face of the shed instead of letting it sit on horizontal upper edges, which is where water dwells long enough to soak in. Keeping the shed dry inside is the reason for it.
The profiles differ by cladding type. Scottish larch is fixed as 20 by 90mm boards with a shadow gap profile, using stainless steel nails. Pine slats are 20 by 40mm battens fixed with 6mm gaps. Cedar slats are 19 by 38mm battens, also with 6mm gaps and stainless steel fixings. Tongue and groove options in pine and cedar close up completely. The slatted options ventilate most freely, which matters for a shed going into a damp or shaded position.
How to Apply Preserver to Pine Cladding
Unpainted pine cladding takes Cuprinol Wood Preserver Clear every 2 to 3 years to prolong its lifespan. Apply it to dry timber in a dry spell, working with the grain, and pay particular attention to end grain and cut edges, which absorb far more water than face grain. Do not apply preserver to wet timber, and do not apply it in autumn or winter when the cladding will not dry between coats. If you plan to paint pine cladding instead, leave it to settle for 3 to 6 weeks after installation first, then use a flexible exterior paint such as Sadolin Superdec. Timing is covered in our seasonal shed maintenance calendar.
How to Weatherproof a Shed Roof
The roof takes more water than every other surface combined, so it is where inspection effort belongs. What you check depends on which covering you have.
Felt Roofs
Check felt roofs for wind damage, and check the edges and laps rather than the middle. Wind gets under the perimeter and under overlapping joints first, lifts the material, and lets water travel along the deck to somewhere it can drip through. A lifted edge is easy to spot from ground level and cheap to fix. A saturated roof deck is neither.
Inspect after every named storm and once before the autumn storm season. Repair and re-felting are covered under our guarantee only where the roof was fitted by our own installation teams.
Living Green Roofs
A living green roof sits on an EPDM liner, and it is the liner that keeps water out, not the plants. The sedum layer above protects that membrane from the two things that age it fastest: freeze-thaw cycling in winter and solar UV in summer. Over half of the sheds we install have living roofs for exactly this reason, and the shading effect is why they need less roof intervention over time, not more. Full detail sits on our living green roofs page.
The maintenance job on a green roof is drainage, not waterproofing. Keep the outlet clear so the substrate drains freely, and pull out any weeds that arrive as wind-blown seed.
The Roof Overhang
The roof projects beyond the walls on every model, between 50mm and 80mm depending on the shed and the axis. That projection throws rainwater clear of the cladding rather than letting it run down the face of the timber, and it clamps the top of the cladding in place. Keep that overhang clear of fences, walls and branches. An overhang resting against a fence transfers water onto the cladding instead of away from it, which defeats the whole detail.
Why Guttering Matters More Than Sealant
A gutter with an outlet and downpipe is fitted as standard on every shed we build, and keeping it clear does more for weatherproofing than any product you can buy. A three-bike Classic Bike Shed has a roof measuring 1150mm by 2100mm, so it collects the rain falling on about 2.4 square metres. That water either leaves through the downpipe or runs down the walls.
Three checks, twice a year:
- Clear the gutter run. Leaves, moss and grit from a green roof substrate all collect at the outlet. Clear it before autumn leaf fall peaks and again once the trees are bare.
- Check the downpipe discharge point. Water should be carried away from the shed base. If it empties onto the paving beside the shed and runs back underneath, extend it or redirect it.
- Check for leaks and splits at the joints. A dripping joint above the cladding will stain and saturate one strip of timber repeatedly.
Sealant has a narrow, legitimate role: closing a specific failed joint on a specific component. It is not a weatherproofing strategy for a timber structure and it will not compensate for a gutter that overflows every time it rains hard.
How to Keep the Base of a Wooden Shed Dry
The bottom of a shed rots before the top does, because that is where water collects and sits. Two things keep it dry.
First, the floor is held clear of the surface. Our sheds sit on adjustable rubber feet that lift the timber floor away from standing water, and those feet adjust across a range of 1cm to 3cm to level the floor during installation. An eco-base is finished around 25mm above surrounding ground level for the same reason. A shed standing directly in water will wick that water upward regardless of what its cladding is made of.
Second, and more often neglected: clear debris away from the walls and base. Soil, leaves, ivy and litter banked against a shed stop the timber breathing, hold a permanently damp zone against the cladding, and eventually cause rot. A broom or rake around the perimeter is the highest-value maintenance job on the entire structure. Do it regularly rather than annually.
This one carries a consequence beyond the timber. Where walls or floors rot prematurely because debris has been left to build up against them, our guarantee is invalidated. Clearing the perimeter is the cheapest thing you can do to keep your cover intact.
If the base itself is the problem, the surface underneath needs changing rather than managing. Grass, soil, loose gravel and uneven paving all hold water against a shed. Our guide to bike shed bases sets out the four surfaces that work.
How to Deal With Condensation in a Wooden Shed
Condensation forms when warm moist air meets a colder surface, usually the underside of the roof on a clear night. It presents as damp patches or drips with no rain, and it is a ventilation problem rather than a waterproofing one.
Timber sheds handle it better than sealed metal ones because timber buffers moisture and because slatted cladding fixed with 6mm gaps allows constant air movement. Not every cladding ventilates equally: pine and cedar slats carry 6mm gaps, larch uses a shadow gap profile, and tongue and groove closes up completely. Sheds destined for a permanently damp or shaded corner do better with slatted pine or cedar than with tongue and groove, since the gaps keep air circulating.
Air circulation is also what protects the contents rather than the structure. Our guide to stopping bikes rusting in a shed covers ventilation, breathable covers and damp management for stored bikes in full, including why a fully waterproof tarpaulin over a bike increases rust risk rather than reducing it.
What Not to Do When Weatherproofing a Wooden Shed
Five actions make a wooden shed wetter. All five are common.
- Do not wrap the shed in tarpaulin or plastic sheeting. An impermeable layer traps moisture against the timber and holds it there, so the cladding never gets the chance to dry out.
- Do not seal the ventilation gaps. The 6mm gaps between slats are a design feature. Filling them stops the air exchange that keeps the interior dry.
- Do not apply a film-forming sealant or varnish over larch or cedar. These timbers move seasonally and shed surface layers. A film will crack, lift and then hold water underneath it in exactly the places you cannot see.
- Do not treat the inside of the shed. The interior is not weather-exposed, treatment there does no protective work, and solvent-based products leave residue in an enclosed space you store equipment in.
- Do not stand a shed on soil, grass or loose gravel to save on a base. No amount of subsequent weatherproofing recovers a shed sitting on ground that holds water and moves.
How to Tell Whether a Wooden Shed Is Actually Weatherproof
Run a six-point inspection twice a year. Each check tells you something specific, and the reading you get points to a specific fix rather than a general worry.
What to check | What you are looking for | What it tells you |
|---|---|---|
Roof edges and laps | Any lift, curl or loose fixing at the perimeter and at overlapping joints | Wind damage in progress. Water is already tracking along the deck even if nothing is dripping yet |
Roof outlet and gutter | Standing water, silt, moss or leaf build-up at the outlet | The gutter is about to overflow in the next heavy rain and run down the cladding |
Cladding at the bottom two rows | Dark staining, soft timber, moss growth or a hard water line | Splashback or standing water at the base. The surface underneath is holding water |
Perimeter of the base | Soil, leaf litter, ivy or grass banked against the walls | The timber cannot dry at that point. This is the single most common route to rot |
Interior roof underside after a cold night | Beading, drips or damp patches with no rain in the previous 24 hours | Condensation, not a leak. A ventilation issue rather than a covering issue |
Door meeting edges and floor line | Daylight visible from inside, or a wet strip on the floor inside the doors | Wind-driven rain is entering the doors. Usually alignment rather than material failure |
If five of the six pass and one fails, fix the one. A shed only needs to be dry, not perfect, and chasing cosmetic weathering on cladding that is doing its job is wasted effort. Silver-grey larch is weathered, not failing.
Weatherproofing Around the Doors
Doors are the hardest part of a wooden shed to keep weathertight, because they are the only part that moves and the only part with a deliberate opening around it. Wind-driven rain finds door gaps long before it finds anything else.
Three things keep ours sealed. The doors carry an extra layer of fixings and are nailed through front and back, which stops them flexing and opening a gap at the meeting edge. A web of ply sits either side of the door opening to carry wind loading into the frame rather than into the doors. On double-door models, 100mm galvanised drop bolts pull the closed leaf down into its socket and hold it square.
What that leaves for you is alignment. Timber moves with the seasons, so doors that closed cleanly in August can bind slightly in February and then sit proud in the spring. If a door stops meeting its partner cleanly, check that the drop bolts still fall into their sockets under their own weight and that the floor is still firm on its feet. A floor that has settled unevenly shows up at the doors first, because the door opening amplifies any twist in the structure.
Oil or grease the hinges, the drop bolts and the lock barrel regularly. Moving parts that seize get forced, and forced doors are what pull a frame out of alignment in the first place.
Weatherproofing Differences Across Bike Shed Models
The four ranges present different weatherproofing priorities because of their shape and where they get sited.
Model | Weatherproofing priority |
|---|---|
Classic Bike Shed | Low roofline in front gardens. The roof projects 50mm each side and 150mm on the depth, so check the overhang against low front walls and railings where contact is easy to miss. |
Slot-In Bike Shed | The largest roof area in the timber range at 2000mm base depth. More collected water per downpipe, so the gutter outlet is the priority check. |
Vertical Bike Shed | Narrow footprint at 1300mm depth, usually sited in side passages and alleyways where leaf litter and debris bank up against the walls fast. Base clearance is the priority. |
Cargo Bike Shed | The sliding lid runs on heavy-duty stainless steel runners. Keep the runners clear of grit and leaf debris so the lid seats fully closed. |
Corten Steel Bike Shed | No treatment and no coating. Expect run-off staining onto adjacent paving during the 5 to 12 month patina period, then a stable surface. |
Weatherproofing Wooden Shed FAQs
What is the best waterproof sealant for a shed?
How do I stop water seeping into my wooden shed at ground level?
Should I treat the inside of a shed?
How often should a wooden shed be treated?
Can you weatherproof a shed in winter?
Does a green roof make a shed more waterproof than felt?
Where to Take This Next
Almost all of the work above is seasonal, and doing it in the wrong month wastes the effort. Our seasonal shed maintenance calendar sets out which of these checks belongs to which part of the year and why the autumn pass matters most.
If you are choosing cladding rather than caring for it, talk to us about your site and we will tell you which finish suits its exposure.